 Dusty Diamonds
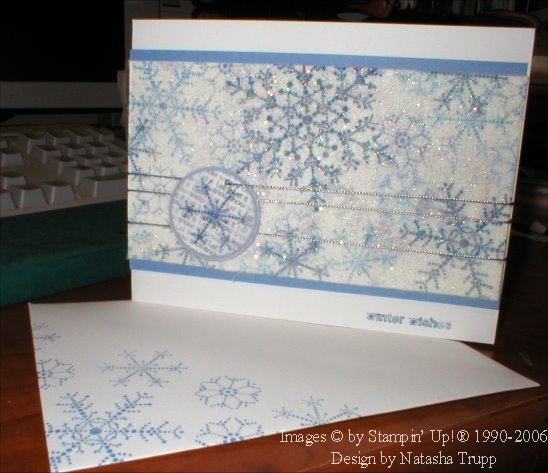
This technique is very simple and it produces gorgeous results. Credits go out to Joan for showing this technique at the latest upline meeting! She didn't give it a title, but it produces similar results to the glitter dryer sheet technique. It creates kind of a dusty, glittery scene, so I'm calling it Dusty Diamonds.
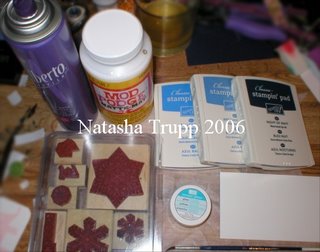
Okay, so here's what you'll need for supplies:
Stamps and ink, Adhesive that will not show through project (I used Mod Podge), interfacing cut slightly oversized of stamped image (I used SEW-ON LIGHTWEIGHT, however, you could use iron-on lightweight; if you decide to do this, you will not need a clear adhesive, because you should be able to iron your interfacing right to the paper!), glitter and matte sealer (I used hairspray, technically the glitter should stick with static, but I didn't want any stray glitter, so I sealed it)
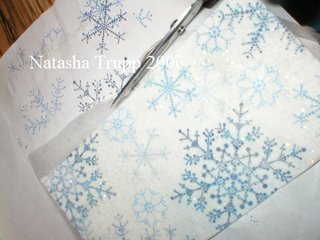
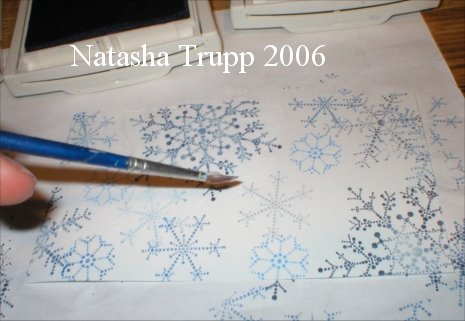
Step 1: Stamp your piece of paper.
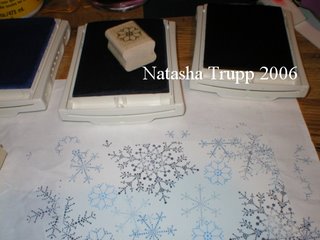
Step 2: Apply your adhesive. If you've got iron-on interfacing, this is where you would iron it on!

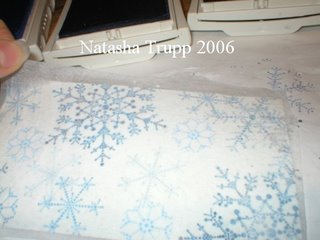
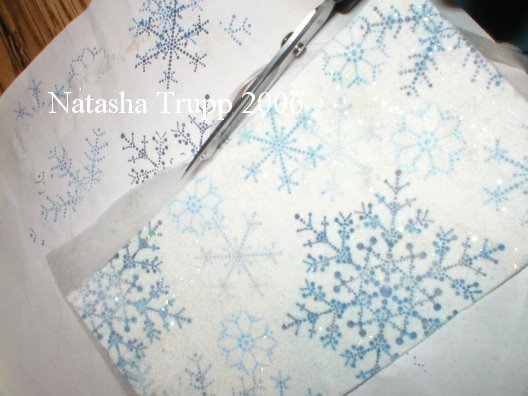
Step 3: Apply interfacing over image. Let dry.
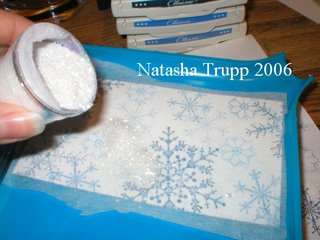
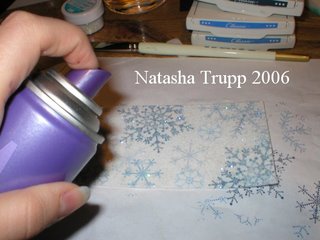
Step 4: Sprinkle glitter over the project.
Step 5: Trim interfacing to fit the stamped paper.
Step 6: Seal image.
Step 7: Complete project! A few helpful hint... The interfaced image has a bit of weight to it, you might want to use stronger than usual adhesive for attaching the image to your finished project.

posted by Natasha at
7:47 PM
![]()

1 Comments:
I can't believe I am the only one leaving comments. This is another great lesson!
Nancy
By Nancy Lake, at 12:44 PM
Post a Comment
<< Home