Palmtrees and Pogosticks: Lessons

Sunday, December 31, 2006

Faux Air Brushing/Splatter Backgrounds


I've given this tutorial multiple titles because your final effect really depends on the colours you use and the distance of your spray.

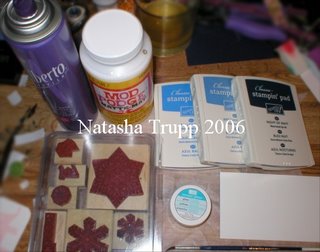
So, for supplies you'll need: Some coordinating reinkers, some mini spray bottles, and some rubbing alcohol.

Because I have limited spray bottles, I only make up a small amount of the mixture at a time. I used 4-5 drops of reinker with about a tablespoon of rubbing alcohol. You can make yours weaker or stronger, it's up to you!


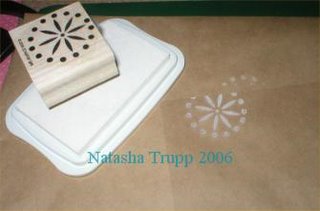
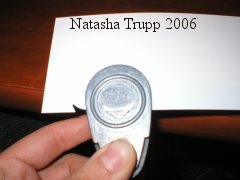
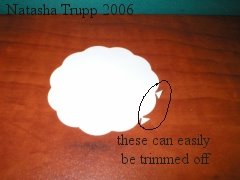
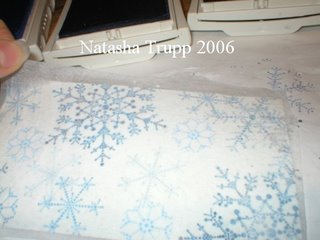
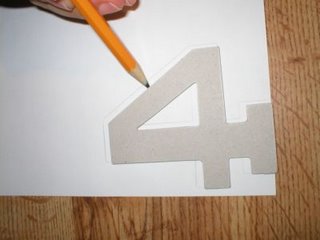
Next, if you are wanting some sort of pattern, make a template. I took a piece of cardstock and a piece of the wax-y backing from transparency sheets, glued them together, then got out all of my circle punches and went to town.


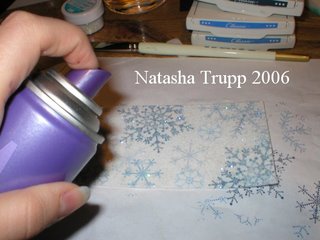
Now, you can start spraying. If you have a template, be sure to hold it down tightly, or the masking may not work as well. Also, if you don't want to spray reinker and alcohol on your hands, I suggest you put on gloves before this step.


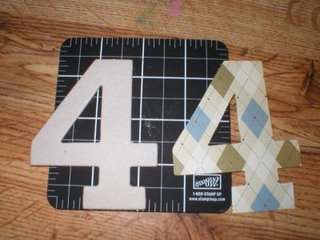
Here's what it looks like after this step:


If you want to add a bit more colour, feel free to mist your image to your heart's content. However, I suggest holding the mister further away from the image.

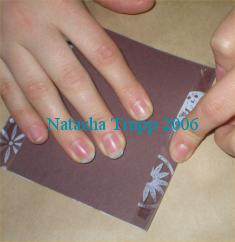
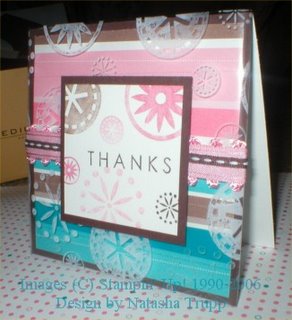
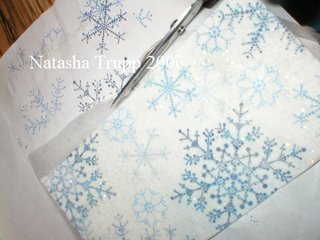
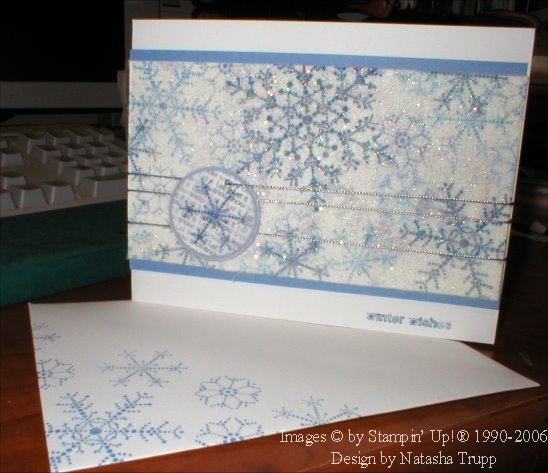
Here's what mine looked like after that. Then simply finish your card!


Saturday, November 18, 2006

"Invisibly attached" transparency overlays

Supplies needed: Stamp sets (I've used Big and Little Pieces); Stazon, Oversized piece of acetate/window sheet; scissors; sticky strip;

Before we start, here are a few helpful hints. When using stazon and acetate, I like to keep some cotton swaps and rubbing alcohol around, just in case I make any mistakes. Rubbing alcohol is a solvent cleaner, so it removes Stazon quite well.

For this type of overlay I am making my cardfront first. It is a square 4.25 card. My oversized acetate piece is 5.5x 4.25. Whatever size cardfront you decide to make, keep in mind that you need to keep your acetate overlay about 1.25 inches longer for ease of attachment.

Step One: Stamp your acetate overlay with stazon.

Step Two: Have the other pieces of your cardfront prepared. (My chocolate piece is 4.25 square, and I have a 4-square piece of designer paper centered on it). Here I have put a piece of designer paper on the chocolate chip. The chocolate chip is my cardfront base. Flip it over. Apply sticky strip onto the corners of the opposite sides, as shown in the picture by the red lines.

Step Three: Place the base overtop of the overlay, center it. Peel off one side of the sticky strip. Carefully, tightly fold over the acetate.

Step Four: Hold the cardfront tightly. Peel off the other lines of sticky strip. Bring up the overlay and fold it over. Make sure you keep a tight grip so that the overlay will lay nice and flat over the rest of the card. The analogy I use for how to hold it is as if you were wrapping a present. You are wrapping the cardfront.

Step Five: Flip the cardfront over and finish up your card!

Friday, October 20, 2006

Scalloped Edge Tutorial

For this technique, all you need is a corner rounder punch and some paper.
1) First step, carefully take off the corner guide and set aside where you won't lose it.


2) Punch your paper once. You can start wherever, it doesn't matter. It's helpful to lay the flat edge of paper against the part of the punch that the corner would normally fit into (it looks like a little v).


3) On this photo, I've traced one of the punch-outs to show approximately where you want place the next punch. Basically, I line up the punch next to the previous punch out, the little curve at the top of the punch just barely overlaps with that part of the punch out. This is almost impossible to take a photograph of or to verbally describe, so I highly suggest practicing to get a feel for it. The overlapping is so minimal that it is barely visible. Also, it's better to not overlap enough, then to overlap too much. If you don't overlap enough, you'll still get a good scalloped shape, if you overlap too much, you'll get an interesting wave-like shape.

4) This photo shows the physical placement of the punch inregards to the previously punched out shape.


5) Then, just keep punching. And there you have it, a lovely scalloped edge!

6) It's quite quick and it works nicely for circles too. If you do a circle, remember that it might not match back up exactly. If you see that that is going to happen, start adjusting the overlaps to allow this, this will end up with requiring a little bit of trimming though. When doing a circle, remember to keep the little corner 'v' as flat as you can against the curve of the circle.

Monday, September 25, 2006

Dusty Diamonds

This technique is very simple and it produces gorgeous results. Credits go out to Joan for showing this technique at the latest upline meeting! She didn't give it a title, but it produces similar results to the glitter dryer sheet technique. It creates kind of a dusty, glittery scene, so I'm calling it Dusty Diamonds.

Okay, so here's what you'll need for supplies:
Stamps and ink, Adhesive that will not show through project (I used Mod Podge), interfacing cut slightly oversized of stamped image (I used SEW-ON LIGHTWEIGHT, however, you could use iron-on lightweight; if you decide to do this, you will not need a clear adhesive, because you should be able to iron your interfacing right to the paper!), glitter and matte sealer (I used hairspray, technically the glitter should stick with static, but I didn't want any stray glitter, so I sealed it)

Step 1: Stamp your piece of paper.

Step 2: Apply your adhesive. If you've got iron-on interfacing, this is where you would iron it on!

Step 3: Apply interfacing over image. Let dry.

Step 4: Sprinkle glitter over the project.

Step 5: Trim interfacing to fit the stamped paper.

Step 6: Seal image.

Step 7: Complete project! A few helpful hint... The interfaced image has a bit of weight to it, you might want to use stronger than usual adhesive for attaching the image to your finished project.

Sunday, August 13, 2006

Basic Chipboard Covering:
When I first saw chipboard, I was totally clueless as to how one went about covering it with designer papers. So here's just a quick little tutorial of how I do it.

First, you'll need these supplies:
Chipboard, Sanding Block or Sand Paper, White Glue, Paint Brush (usable with glue), Pencil, Hobby Blade, Cutting Mat, and Scissors.


Start by flipping the designer paper over and trace the desired chipboard piece backwards.


After tracing around the chipboard, start to cut it out. If your piece has any center cutouts, cut those out first with the hobby blade, it just makes things easier to do this first. Then, carry on cutting around the traced image.

At this stage you now have a lovely cut-out designer paper duplicate of your chipboard piece. You could stop at this stage, but adhering the paper to the chipboard definitely adds a lovely bit of dimension. Just a note, the cut out piece will be slightly bigger than the chipboard (that's a good thing).

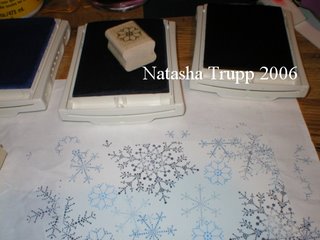
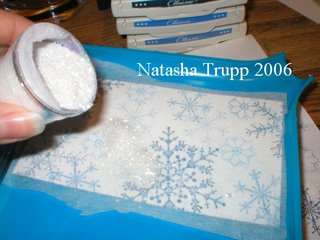
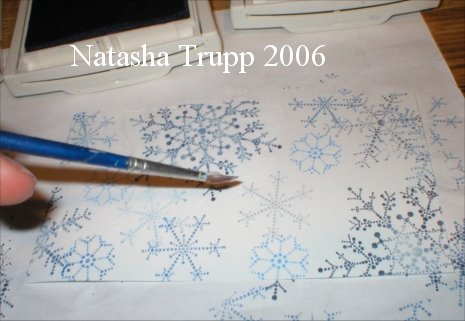
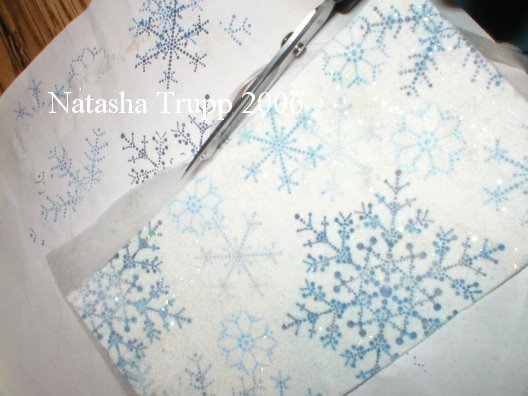
Next, apply the white glue to the chipboard. I just swirl it around in the center of the chipboard. Don't worry if it's globby, that what we will use the paintbrush for.


Now, use the paintbrush to smoothen out the glue. At this point, you can also use the paintbrush to scrape off some of the glue, if you think you have too much.

Now, you can finally adhere the chipboard to the paper! To do this, I lay the chipboard face up, then lay the paper overtop. Then I flip the entire thing over, and make sure the chipboard is centered on the designer paper. Because we used white glue, the chipboard is slippery for a short time, so you can move it, if necessary. Let it dry.


Now, once again, you could leave it. However, sanding all along the edges will give the chipboard a lovely rounded, as well as distressed look. Take your sanding block, and go to town along the edges. For tight inside corners, I suggest using folded sandpaper, since it is more formable than a block.

There you have it! Now you have a lovely decorated piece of chipboard to use to embellish your cards, scrapbook pages and more!